Servers on Slicie scale automatically!
Try it free for 60 days at slicie.com
cPanel Account Guide: WordPress
Installing WordPress with WP Toolkit
You have a few choices for how you setup WordPress on your cPanel account, but we're only going to guide you through WP Toolkit.
- Using WordPress Toolkit
This the simplest method and is supported directly by cPanel.
- It will install the latest version for you.
- It will update WordPress and your themes and plugins automatically.
- You can pick certain plugins, like WooCommerce, which is an extremely popular platform for running an online store.
- Using Softaculous
Softaculous has been supporting WordPress on cPanel servers for many years. They have a great guide for installing and managing Wordpress.
- It will install the latest version for you.
- It will update WordPress and your themes and plugins automatically.
- It will install any plugin supported by WordPress.
- Manual Install
It's hard to recommend this. The truth is that most WordPress sites wind up getting exploited due to outdated software. You don't really lose any control using one of the options above, as you can always disable the integration with your site.
- You need to upload the WordPress files to your account.
- You need to manually install WordPress and all of its plugins and themes.
- You need to keep everything up to date to avoid getting hacked.
Installing WordPress with WP Toolkit
There will be several places within the cPanel interface that link to "WP Toolkit". It's in the section titled "Domains", as well as in the left-side navigation on desktop browsers.
Once you click into the "WP Toolkit" page, you'll see a listing of all your WordPress installs on your account. If you clicked the "WordPress" option when first logging into cPanel, you might see one here. We recommend you delete that installation - to do so, click the checkbox next to your subdomain and then click the "Remove" button.
There will be a button on the WP Toolkit page that says "Install", click that. There will be a form with a handful of options, we'll explain a few.
- Installation path: This is the directory (folder) that your site will go into. For instance, if you leave it blank, your WordPress site will be https://example.slicie.io. If instead you were to enter "wp", your site will be https://example.slicie.io/wp If you're going to eventually point a domain you own to this site, feel free make the directory "example.com".
- Plugin/theme set: You can install plugins and themes later, but you can choose to do so during the install here. If you intend to have an online business, you'd pick E-Commerce pack. "Jetpack", which can be chosen in different ways, is a 3rd party backup service that allow you to sync your site to other companies.
- Email: Set this to your email address, don't leave it as the default.
- Automatic Update Settings: For new users, we recommend you CHECK the box titled "Enable autoupdates by default for new plugins installed via WP Toolkit" and "Enable autoupdates by default for new themes installed via WP Toolkit"
Once you're done specifying these options, click the blue "Install" button. It will take about a minute to install. The interface will automatically update, but it's not very quick to check for updates.
Wait for WordPress to install
It should take about one minute to install your WordPress site, depending on the plugin/theme setup you chose.
Installing WordPress with WP Toolkit
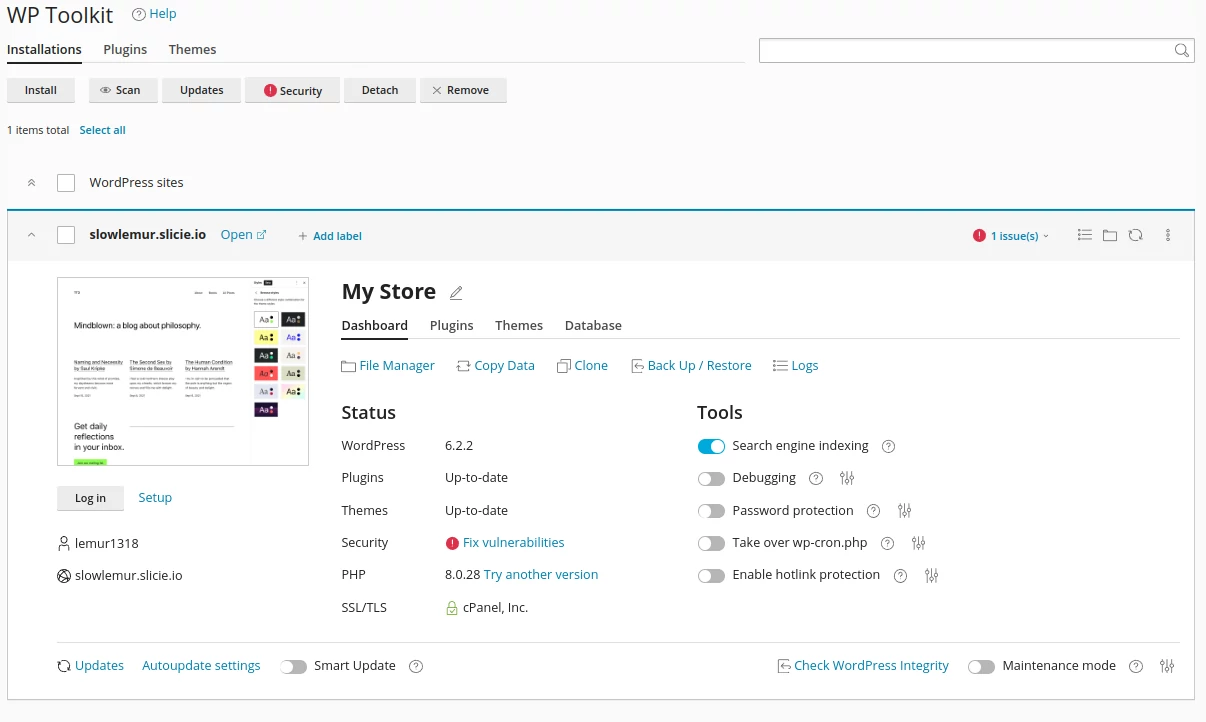
When you first create a WordPress site with WP Toolkit, the security features will all be disabled. You'll see messages telling you to "Fix Vulnerabilities" as well as "Issues" about forcing HTTPs (not allowing people to view http:// URLs without SSL locks).
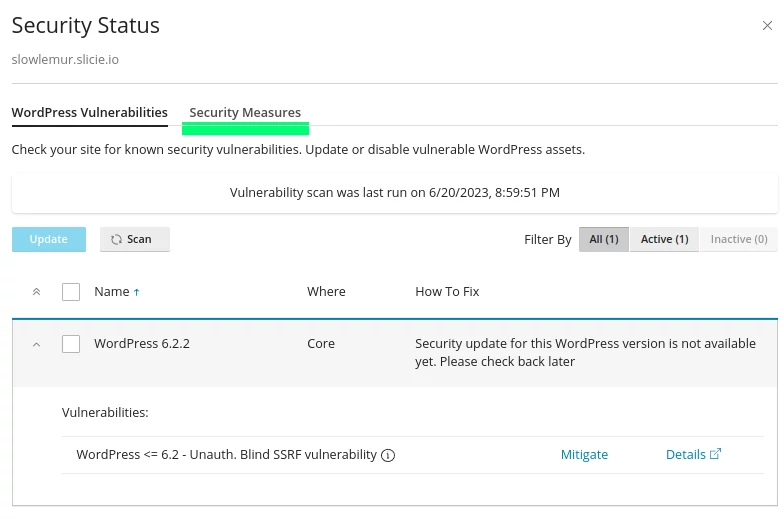
We recommend that you enable all of the security features within WP Toolkit, and only disable them if you need to in the future. To do this, click "Fix Vulnerabilities". Once you've done this, you'll be shown two tabs, "WordPress Vulnerabilities" (the default), and "Security Measures". Click "Security Measures".
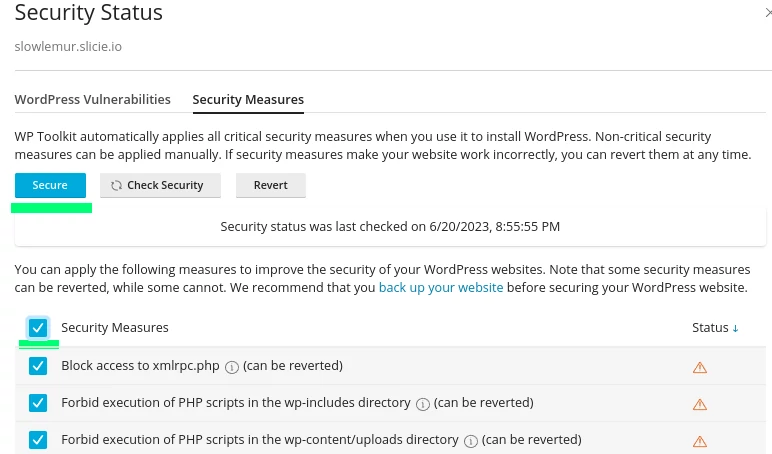
On the "Security Measures" tab, enable the top checkbox to enable all of the security features. Once you've done that, simply click the blue "secure" button.
Logging into WordPress
There is a button that says "Log in". When you click that button, it will automatically log in you into the admin area of WordPress.
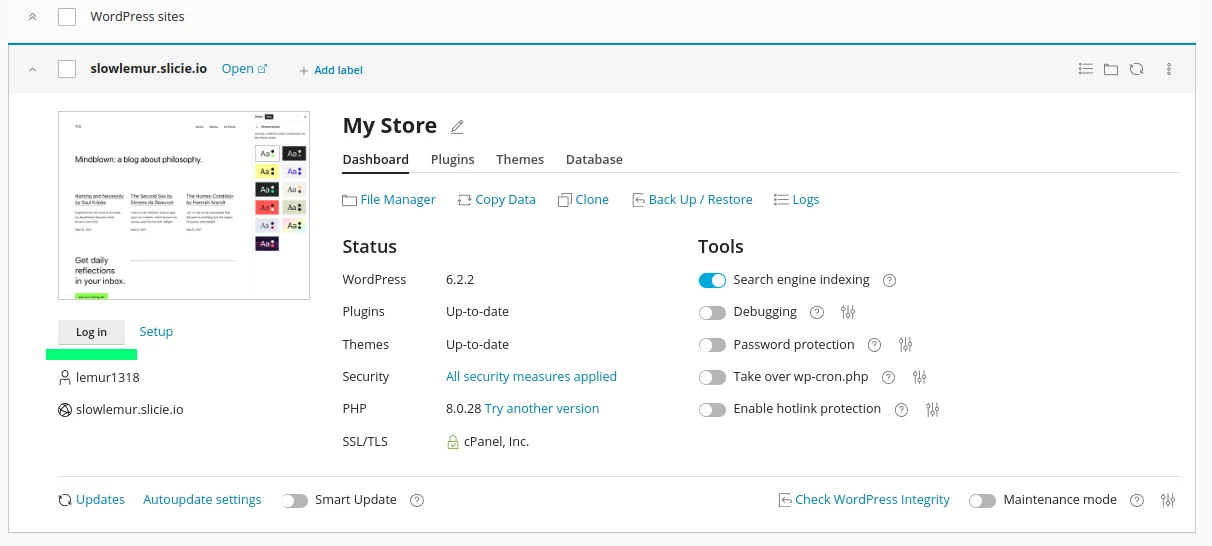
Once you've logged in, you'll be in the latest version of WordPress.
Keep learning about cPanel Accounts on Slicie
Now that you've setup WordPress, learn about accessing your site!